Building a URL shortener with Python, Terraform, GCP, and ADO
I’ve been working on building skills in cloud computing with Google Cloud Platform (GCP) for a few months now and have been itching to complete another project to accelerate my learning a bit. Last August, I deployed a debt calculator web app using GCP products like Cloud Build and Cloud Run. You can read my write up on that here.
With this next project, which I decided would be a URL shortener, I wanted to add a little complexity, particularly for situations where you might need to connect two cloud providers together (Azure and GCP in this case). Some key differences here were
1) I wanted to manage the GCP infrastructure with Terraform, which is an Infrastructure-as-Code (IaC) language used to declaratively manage cloud infrastructure. It makes the process of infrastructure creation and maintenance more reliable because instead of manually configuring everything from the Console or gcloud, you declare the configuration in .tf files and resources are only created or destroyed when the infrastructure state differs from what you’ve declared.
2) My debt calculator web app used Github Actions for the build and push step, but I wanted to get some experience using Azure DevOps (ADO) pipelines to manage the CI/CD piece, so this project uses pipelines instead.
3) At this point in my career, I would call myself an intermediate Python developer, but there is still so much I don’t know. To expand my skill set in Python as well, I decided to get my feet wet writing application programming interfaces (APIs) with FastAPI. I’d never done this before and it was a lot simpler and more fun than I thought it would be!
Finally, before diving in, I want to point out that the end result of this project is not a service that’s publicly accessible. There are a number of security concerns with running a public facing URL shortener that I am not qualified to address, and since that is well outside the scope of this write up, I’ve opted not to make it publicly accessible. There are some demo videos below so that you can see it in action, and you could even clone the Github repository and run it yourself, so that’s kind of neat. :)
How a URL shortener works
The bare bones machinery of a URL shortener is pretty simple under the hood: it’s an API that accepts a long URL and returns a much shorter URL that, when visited, redirects the user to the long URL. This is a simple, fully functional implementation in Python:
from fastapi import FastAPI, HTTPException
from fastapi.responses import RedirectResponse
from pydantic import BaseModel
import string
import secrets

class LongURL(BaseModel):
	url: str

alphabet = string.ascii_letters + string.digits

def generate_short_url():
	return ''.join(secrets.choice(alphabet) for i in range(8))

url_map = {}

app = FastAPI()

@app.post("/")
def create_record(long_url: LongURL):
	if not long_url.url.startswith(('https://', 'http://')):
		raise HTTPException(
			status_code=400,
			detail="URLs must begin with https:// or http://"
		)
	short = generate_short_url()
	url_map[short] = long_url.url
	return short

@app.get("/{short_url}")
def get_record(short_url):
	if short_url in url_map:
		return RedirectResponse(url_map[short_url])
	else:
		raise HTTPException(status_code=404, detail="URL not found")
To run this, you need an environment with the fastapi package installed. Then, from the working directory, run
fastapi dev api.py
You’ll see some output about the app starting, and then that Uvicorn is running. Navigate to 127.0.0.1:8000/docs to view the built in API documentation that comes with FastAPI. This documentation is slick because you can interact with the API from them, which makes testing things out pretty easy:
I was surprised at how little code something like this needs to run. We have a class object LongURL to manage passing the long URL in the request body, a function that generates a pseudorandom 8-character alphanumeric code, and a dictionary to hold the map between short and long URLs.
On the API side, a URL shortener needs only two methods: a POST method to store new entries in the URL map and a GET method for handling redirects. The redirect goes to a corresponding long URL if the short URL path parameter exists in the map dictionary, otherwise we get a 404 error back.
Of course, an implementation like this has a number of problems. Storing the mapping between short and long URLs in a Python dictionary is not very efficient or scalable, which is why I will switch the mapping to be stored using GCP’s Firestore later. There are no controls for handling abuse, which is why this isn’t publicly available. But for my purpose of learning a bit about how APIs work, this is plenty.
Storing URL maps in Firestore
So storing the URL map in a Python dictionary isn’t a great idea. An alternative that will work well with GCP’s Cloud Run is Firestore, a document based (i.e., NoSQL) database. Each document in the database will represent a relationship between a short URL and a long URL. The document’s name will be the short URL, and its contents will be a single key-value pair containing the long URL. So now, I can modify the implementation above to use Firestore instead, with the changes highlighted below:
from fastapi import FastAPI, HTTPException
from fastapi.responses import RedirectResponse
from pydantic import BaseModel
from google.cloud import firestore
import string
import secrets
import os

if os.environ.get("ENV") == "local":
	os.environ["FIRESTORE_EMULATOR_HOST"] = "localhost:8080"

db = firestore.Client()

class LongURL(BaseModel):
	url: str

alphabet = string.ascii_letters + string.digits

def generate_short_url():
	return ''.join(secrets.choice(alphabet) for i in range(8))

app = FastAPI()

@app.post("/")
def create_record(long_url: LongURL):
	if not long_url.url.startswith(('https://', 'http://')):
		raise HTTPException(
			status_code=400,
			detail="URLs must begin with https:// or http://"
		)
	short = generate_short_url()
	new_document = db.collection("urls").document(short)
	new_document.set({"long_url": long_url.url})
	return short

@app.get("/{short_url}")
def get_record(short_url):
	doc_ref = db.collection("urls").document(short_url)
	doc = doc_ref.get()
	if doc.exists:
		return RedirectResponse(doc.to_dict()["long_url"])
	else:
		raise HTTPException(status_code=404, detail="URL not found")
Configuring Firestore for local development
I have an environment variable ENV=local set in my ~/.bashrc so every terminal process can see it. The intention is that I can tell processes that they are running locally on my laptop and not somewhere else, like GCP. When developing locally, I used the Firestore emulator to simulate an actual Firestore resource on GCP. It can be run with the gcloud utility, or you can install and run it with npm:
npm install -g firebase-tools
firebase init emulators # choose the "Don't set up a default project" option if prompted
firebase emulators:start
In the first several lines of the updated API implementation, I import google.cloud.firestore and start the Firestore client. I also add an environment variable FIRESTORE_EMULATOR_HOST when the API runs in my local development environment that ensures the client will only talk to the emulator and won’t try to connect to GCP. This makes the code work seamlessly in both my local environment and on GCP.
If you encounter an error running firebase emulators:start saying that there are no emulators to start, you may need to tweak the firebase.json file. When you run firebase init emulators, it creates a firebase.json file in your working directory. This configuration spells out that you want a single Firestore emulator running through port 8080:
{
  "emulators": {
    "firestore": {
      "port": 8080
    }
  }
}
After starting the emulator and the new API implementation, you can go back to the API docs page and test out the setup. It should work exactly the same as before, only now, the URL map is being stored much more practically in a database instead of in a Python dictionary.
Containerization with Docker
The next step in inching toward deploying the API on GCP is to containerize the app so that it can be pushed to a GCP Artifact Registry. This step can be completed with a pretty straight forward Dockerfile:
FROM python:3.12-slim

WORKDIR /app

COPY requirements.txt .
RUN pip install --no-cache-dir -r requirements.txt

COPY . .

EXPOSE 8080

CMD exec uvicorn app.api:app --host 0.0.0.0 --port $PORT --workers 1
Starting with the slim Python 3.12 image, I copy the requirements file into the container (which are very minimal–just google-cloud-firestore, uvicorn, and fastapi) and install them, and copy all the app code into the container. Then, I expose port 8080 because this is the port Cloud Run will expect when I deploy on GCP. Now I can start uvicorn to run the app with a single worker.
Finally, I run docker build . from the project’s root directory to build the container image. All done! Running the image locally is possible, but since there is no Firestore instance for the app to connect to, it won’t work. I’m certain there are ways to run the container locally, but it didn’t feel important to dive into that. I just want to get this deployed!
Setting up infrastructure on GCP
So at this point, I have a working app and a container image that runs the app. Now, I’m ready to start creating some cloud infrastructure to deploy. As promised, I’m going to manage the cloud infrastructure with Terraform.
Terraform is a tool used for managing cloud infrastructure by creating configuration files written with the Hashicorp Configuration Language (HCL). When you install Terraform, it comes with a CLI that allows you to create, modify, and destroy resources as needed. You can find instructions for installing that CLI for your system here.
Getting started with Terraform
There are many pieces of infrastructure that go into deploying a service like this, even though the service itself is very simple. I want to go over each of these in detail, so I’ll break this down into several subsections. As a high level overview, this is the complete set of resources that are needed to deploy the API:
- An Artifact Registry to store the container image in
- A Firestore database to store the URL map
- A Cloud Run instance to run the container
- A service account for the Cloud Run instance that has permission to access the Firestore database
Later, when we talk about the ADO pipelines that I created to manage deployment and infrastructure, there will be an additional service account for each pipeline with their own sets of permissions, but these are the bare minimum resources needed to run the app.
The Terraform that configures all of this is as follows (we’ll break this down line by line next):
# Configures Terraform, specifies Google as a required provider
terraform {
  backend "gcs" {}
  required_providers {
    google = {
      source  = "hashicorp/google"
      version = "7.15.0"
    }
  }
}

# Tells the Google provider what project and region we're using
provider "google" {
  project = var.project_id
  region  = var.region
}

# Creates an artifact registry for the docker container image
resource "google_artifact_registry_repository" "repo" {
  location      = var.region
  repository_id = "repo"
  description   = "Artifact registry to hold the container image"
  format        = "DOCKER"
}

# Creates a cloud run v2 instance and specifies the associated service account
resource "google_cloud_run_v2_service" "run" {
  name                = "cloudrun-service"
  location            = var.region
  deletion_protection = false
  ingress             = "INGRESS_TRAFFIC_ALL"

  template {
    service_account = google_service_account.cloud_run_sa.email
    containers {
      image = "${var.region}-docker.pkg.dev/${var.project_id}/${google_artifact_registry_repository.repo.repository_id}/url-shortener:latest"
    }
  }
}

# Creates a Firestore instance for storing the URL mappings
resource "google_firestore_database" "database" {
  project     = var.project_id
  name        = "url_map"
  location_id = var.region
  type        = "FIRESTORE_NATIVE"
}

# Creates a service account that will be used with Cloud Run
resource "google_service_account" "cloud_run_sa" {
  account_id   = "cloudrun"
  display_name = "Cloud Run Service Account"
  project      = var.project_id
}


# Gives the Cloud Run service account permissions to read and
# write documents in the Firestore instance
resource "google_project_iam_member" "firestore_binding" {
  project = var.project_id
  role    = "roles/datastore.user"
  member  = "serviceAccount:${google_service_account.cloud_run_sa.email}"
}
variable "region" {
  description = "The region used for all resources"
  type        = string
}

variable "project_id" {
  description = "The project ID"
  type        = string
}
region     = "us-west4"
project_id = "project-id-here"
Let’s go through all of this piece by piece to understand what it all means.
Overall Terraform configuration and providers
# Configures Terraform, specifies Google as a required provider
terraform {
  backend "gcs" {}
  required_providers {
    google = {
      source  = "hashicorp/google"
      version = "7.15.0"
    }
  }
}

# Tells the Google provider what project and region we're using
provider "google" {
  project = var.project_id
  region  = var.region
}
This block does overall configuration of the provider and Terraform itself. Providers are plugins that are used to interact with different cloud platforms. In this case, the provider is google and the configuration specifies version = "7.15.0", which was the most up to date version available when I started this project.
The option backend "gcs" {} tells Terraform that the backend (i.e., where the existing infrastructure state will be stored) is a Google Cloud Storage bucket. So in this bucket, Terraform will store data that says “the last time I looked at this infrastructure, it had resources W, X and Y”. Then, when infrastructure is applied again, it will refer to that bucket and see “resource X and Y are here, but there is also supposed to be a resource Z, so I’ll create that now since it’s missing” or “there’s a resource W that isn’t supposed to be here, so I’ll destroy it..”
The google provider block itself is just used to configure the project ID of the project I’m working out of and the region I want to use.
There are many more configuration options for both of these blocks, but these options are plenty for my use case.
Artifact Registry
# Creates an artifact registry for the docker container image
resource "google_artifact_registry_repository" "repo" {
  location      = var.region
  repository_id = "repo"
  description   = "Artifact registry to hold the container image"
  format        = "DOCKER"
}
An Artifact Registry is a set of repositories that hold container images. This block creates a new Artifact Registry in my specified region (us-west4) with a repository in it called “repo”. I also specify that this registry will be used for Docker container images with format = "DOCKER".
When a container image is pushed to the artifact registry, the image can be passed to Cloud Run with a URL of the form <location>.docker.pkg.dev/<project ID>/<repository_id>/<app name>:<tag>.
Cloud Run
# Creates a cloud run v2 instance and specifies the associated service account
resource "google_cloud_run_v2_service" "run" {
  name                = "cloudrun-service"
  location            = var.region
  deletion_protection = false
  ingress             = "INGRESS_TRAFFIC_ALL"

  template {
    service_account = google_service_account.cloud_run_sa.email
    containers {
      image = "${var.region}-docker.pkg.dev/${var.project_id}/${google_artifact_registry_repository.repo.repository_id}/url-shortener:latest"
    }
  }
}
This block creates the Cloud Run resource. I used the v2 resource because it’s a little easier to configure that the original version. One interesting field here is deletion_protection = false, which can be used to prevent Terraform from destroying a resource. If this is set to true, then it has to be explicitly disabled before Terraform will destroy it.
The ingress = "INGRESS_TRAFFIC_ALL" option allows traffic from any source, including the open internet. I mentioned earlier that this service is not publicly accessible, but that’s only because I don’t leave it running. This option allows anyone to access the instance. There are other options that allow limiting traffic to your own virtual private cloud (VPC) or managing traffic through a load balancer.
The template block configures how the container is supposed to run. This template assigns my cloud_run_sa service account (declared later in main.tf) to the container, which also specifies what other services and APIs the container can access. The only other item I need to specify is where to find the container image, which is in the Artifact Registry. Using the latest tag in the image URL ensures that the most recent version of the API pushed to the registry is the one that will be served by Cloud Run.
Firestore database
# Creates a Firestore instance for storing the URL mappings
resource "google_firestore_database" "database" {
  project     = var.project_id
  name        = "url_map"
  location_id = var.region
  type        = "FIRESTORE_NATIVE"
}
This block creates the Firestore database that stores the URL mappings. The type = "FIRESTORE_NATIVE" option is generally the ideal choice for new applications since it provides the more modern document type database mode. The other option for this field is DATASTORE_MODE which is a legacy compatibility mode typically used for migrating existing Firestore instances. In this instance, native mode is the best choice for me, although either would probably work.
Cloud Run service account and permissions
# Creates a service account that will be used with Cloud Run
resource "google_service_account" "cloud_run_sa" {
  account_id   = "cloudrun"
  display_name = "Cloud Run Service Account"
  project      = var.project_id
}

# Gives the Cloud Run service account permissions to read and
# write documents in the Firestore instance
resource "google_project_iam_member" "firestore_binding" {
  project = var.project_id
  role    = "roles/datastore.user"
  member  = "serviceAccount:${google_service_account.cloud_run_sa.email}"
}
Cloud Run requires a service account because the service account specifies what the instance can and can’t access throughout the project. This is important because your container applications running in Cloud Run often need to connect to other GCP products. In this case, Cloud Run needs to connect to the Firestore database to read and write URL maps.
If you don’t explicitly specify a service account in your Cloud Run instance, it uses the default Compute Engine service account. The reason you might want to create a special service account just for Cloud Run is the principle of least privilege. The default Compute Engine service account has the Editor role (roles/editor) which comes with sweeping permissions across the GCP product suite. As of the time of writing this, the Editor role comes with 11,048 permissions. That’s a lot!
My Cloud Run instance really only needs to access the Firestore database (roles/datastore.user), so it would be silly (and extremely reckless in a production setting) not to create a service account specifically for Cloud Run that only has access to read and write Firestore. The two Terraform blocks above create that service account and grant access to read and write the Firestore database.
Variables
Terraform lets you manage variables (think things you would probably type over and over again throughout your main.tf) in a really smart way. In the same directory as your main.tf, you can create a variables.tf to keep track of all the variables across your project; you can specify their data types and give them descriptions so that it’s clear what everything is doing. I only have two variables right now:
variable "region" {
  description = "The region used for all resources"
  type        = string
}

variable "project_id" {
  description = "The project ID"
  type        = string
}
Then, you can declare explicit values for these variables in a .tfvars file, like this:
region     = "us-west4"
project_id = "project-id-here"
This way, I can easily refer to my project ID or the region I want to deploy to anywhere in my Terraform configuration with var.project_id and var.region respectively. This also makes it easy to change those values if I ever need to, since I only have to update them in this one spot.
terraform init, plan, and apply
Once the Terraform configuration is finished, applying the configured infrastructure to the project is as simple as running three commands in the Terraform CLI. I won’t cover these in a ton of detail, but I’ll provide a brief overview. You can learn a ton more about these commands (and others) here.
| Command | What do? | Useful flags |
|---|---|---|
terraform init | Downloads required provider dependencies as specified in the configuration | -backend-config=<file path> allows you to specify the name of the GCS bucket in a .conf file so you don’t have to enter it manually every time. |
terraform plan | A sort of “dry run”; takes the configuration and makes a plan for what resources need to be created, modified, or destroyed, then prints the plan in the terminal for review | -var-file=<file path> allows you to specify the .tfvars file you want to use; otherwise undeclared variables have to be entered into the terminal manually. Very useful for managing different sets of variables for different environments (e.g., prod, staging, test) |
terraform apply | Make the required changes to the infrastructure; destroy, create, and/or modify resources until the infrastructure state matches the state declared by the configuration files | Also -var-file=<file path>, see terraform plan. |
Pipelines in Azure DevOps
At this stage of this project, I can run the terraform init, plan, and apply commands to create all my underlying infrastructure and they will mostly work. The missing piece is getting the container image to the Artifact Registry. I can create an Artifact Registry with the Terraform configuration above, but that doesn’t handle pushing my containerized app to the registry so it can be served up by Cloud Run. Because of that, the Cloud Run instance will error out because no container image will exist at the URL specified in the configuration. This is where the ADO pipeline comes in.
With my personal Outlook account, I was able to create my own personal project in Azure DevOps for free, and that gets me access to ADO’s pipeline features.
Pipeline Organization
At this point, the main issue that needs to be addressed by a pipeline is the process of building the container image and pushing it to the Artifact Registry. Ideally, the pipeline would be automatically triggered to run whenever a change gets pushed to the main branch of the repository, but only if that change actually impacts the app’s source code (e.g., rebuilding the app is unnecessary for a change in the README.md).
And although I can just run Terraform commands from my laptop, it would be nice if changes to the infrastructure were automatically applied whenever a change gets pushed to the main branch that impacts the Terraform files. That way, everything is completely automated and all I need to worry about is pushing my code to the ADO repository.
Since these are two distinct jobs that are ideally triggered by changes in different parts of the repository, I opted to create two pipelines: one for applying infrastructure changes and another for building and pushing the container image.
Pipeline service accounts
To continue working under the principle of least privilege, I decided that each pipeline should have its own GCP service account. The app pipeline service account (called app_pipeline_sa in the Terraform and from here on out) needed far fewer permissions than the infrastructure pipeline service account (called infra_pipeline_sa) since the app pipeline doesn’t need to create, modify, or destroy any resources. In fact, the infra_pipeline_sa needs the roles/resourcemanager.projectIamAdmin role to manage all of the service accounts and the permissions they get. This is worth paying attention to because this role is really powerful: it allows the infra_pipeline_sa to determine what service accounts can do what.
To configure these service accounts, there are a few additional blocks that need to be added to the main.tf:
# ... earlier configuration details

# Creates a service account for the app pipeline that's allowed to
# push images to the artifact registry and update Cloud Run

resource "google_service_account" "app_pipeline_sa" {
  account_id = "apppipeline"
  display_name = "App Pipeline Service Account"
  project = var.project_id
}

resource "google_project_iam_member" "cloud_run_developer" {
  project = var.project_id
  role    = "roles/run.developer"
  member  = "serviceAccount:${google_service_account.app_pipeline_sa.email}"
}

resource "google_project_iam_member" "artifact_registry_writer" {
  project = var.project_id
  role    = "roles/artifactregistry.writer"
  member  = "serviceAccount:${google_service_account.app_pipeline_sa.email}"
}

resource "google_service_account_iam_member" "app_pipeline_act_as_cloud_run" {
  service_account_id = google_service_account.cloud_run_sa.name
  role               = "roles/iam.serviceAccountUser"
  member             = "serviceAccount:${google_service_account.app_pipeline_sa.email}"
}

# Creates a service account for the infrastructure pipeline that's
# allowed to make infrastructure changes to the artifact registry,
# cloud run, firestore, etc.

resource "google_service_account" "infrastructure_pipeline_sa" {
  account_id = "infrapipeline"
  display_name = "Infrastructure Pipeline Service Account"
  project = var.project_id
}

resource "google_project_iam_member" "infrastructure_admin" {
  for_each = toset(var.infra_pipeline_roles)
  project = var.project_id
  role = each.value
  member = "serviceAccount:${google_service_account.infrastructure_pipeline_sa.email}"
}
Let’s briefly discuss what each of these block types do.
-
google_service_accountcreates a service account. I gave each of them a descriptiveaccount_idanddisplay_name, then specified the project to create them in. Pretty straight forward. -
google_project_iam_memberadds a role to a service account in the specified project. For theapp_pipeline_sa, this wasroles/run.developerso it can make changes to Cloud Run androles/artifactregistry.writerso that it could push container images to the Artifact Registry. For theinfra_pipeline_sa, there are many admin roles that are required so that it can create and destroy resources, including service accounts and permissions. -
google_service_account_iam_memberallows a service account to act as another. This was needed for theapp_pipeline_saso that it could act as the Cloud Run service account from earlier.
Since the infra_pipeline_sa needed several roles, I used Terraform’s version of a for-loop in main.tf and added this to the variables.tf:
variable "infra_pipeline_roles" {
  description = "The set of roles required by the infrastructure pipeline service acccount"
  default = [
    "roles/artifactregistry.admin",
    "roles/run.admin",
    "roles/datastore.owner",
    "roles/storage.admin",
    "roles/iam.serviceAccountAdmin",
    "roles/iam.serviceAccountUser",
    "roles/resourcemanager.projectIamAdmin"
  ]
}
Pipeline authentication
Being perfectly honest, sorting out authenticating as these service accounts from ADO was… unpleasant. I opted to use service account keys, which are JSON files that contain a private key that can be used to authenticate as the service account from anywhere. This makes them a bit of a security risk, and there are better options like Workload Identity Federation, but that is its own can of worms and felt out of scope for now. Just know that, generally, in production especially, you probably wouldn’t want to do this.
So service account keys it is. ADO does not have a native GCP service connection type, although there are extensions that address this. I tried a Terraform extension and a GCP extension and could not get either of them to work. I won’t blame the extensions though, it was more than likely user error. Luckily though, ADO has a pipeline feature called the Library, which is a way to store variables, including sensitive secrets like service account keys, in ADO for use by pipelines.
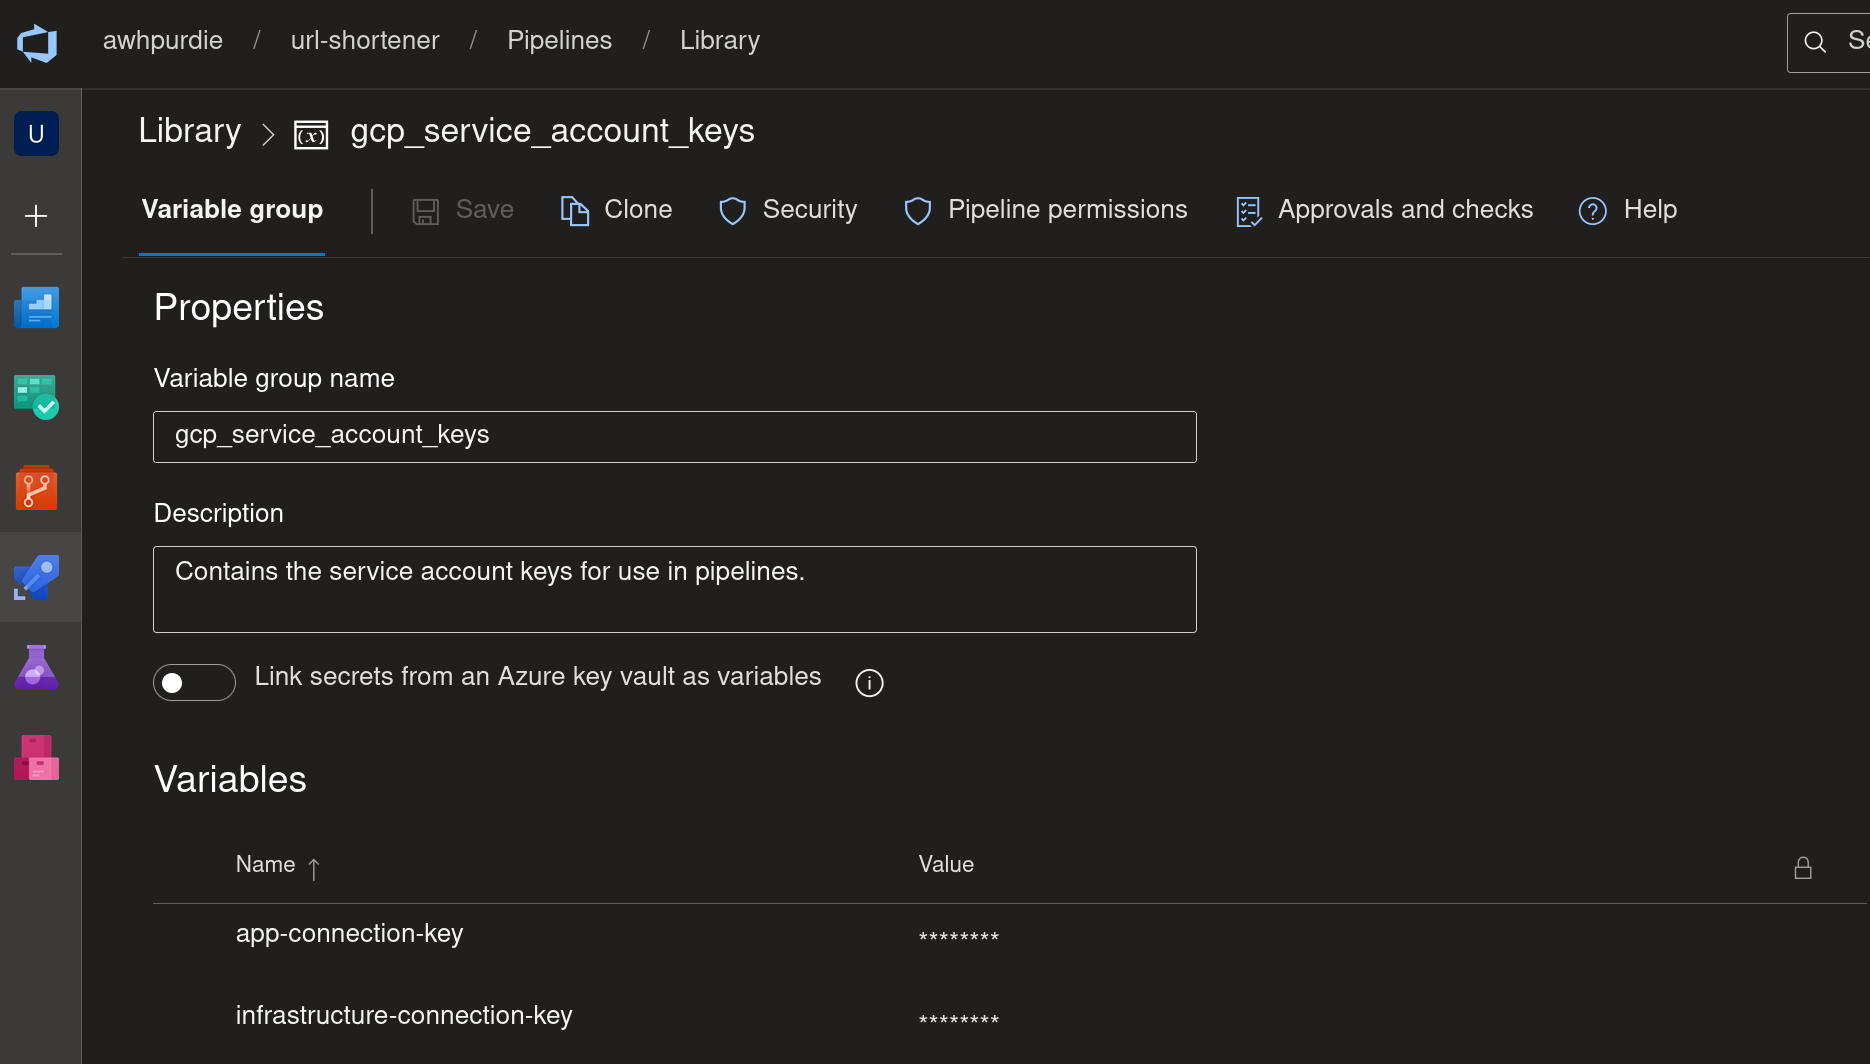 This allows me to reference the keys in my pipelines, which made authentication a lot more streamlined. ADO also allows you to be really specific about which pipelines have access to which variable groups. Speaking of, it would probably make more sense to keep each of these keys in their own variable groups so I could give the app pipeline access to only the
 app_pipeline_sa key and the same for the infra pipeline and the infra_pipeline_sa key.
Oh well, do as I say, not as I do… or something like that.
One final note about authentication: the keys stored in these variable groups are obfuscated through simple Base64 encoding. Just because it’s the key to the city doesn’t mean it needs to be served on a silver platter.
Writing the app pipeline
So much talk about pipelines and authenticating and service connections and so little actual pipeline writing. Let’s actually get into how these pipelines work finally. This is the app pipeline:
trigger:
  branches:
    include:
      - main
  paths:
    include:
      - requirements.txt
      - /app/*

variables:
  - group: gcp_service_account_keys
  - group: gcp_project_variables

stages:
  - stage: Authenticate
    jobs:
      - job: AuthenticateBuildAndPush
        pool:
          name: DEFAULT
          demands:
            - Agent.Name -equals ubuntu-agent1
        steps:
          - script: |
              echo "$GCP_KEY" | base64 -d > $(Agent.TempDirectory)/gcp-key.json
            displayName: CopyKeyToAgent
            env:
              GCP_KEY: $(app-connection-key)
          - script: |
                gcloud auth activate-service-account --key-file=$(Agent.TempDirectory)/gcp-key.json
                gcloud auth configure-docker $(region)-docker.pkg.dev
            displayName: AuthArtifactRegistry
            env:
              GOOGLE_APPLICATION_CREDENTIALS: $(Agent.TempDirectory)/gcp-key.json
          - script: |
              docker build -t $(region)-docker.pkg.dev/$(project_id)/$(docker_repo)/url-shortener:latest .
              docker push $(region)-docker.pkg.dev/$(project_id)/$(docker_repo)/url-shortener:latest
            workingDirectory: '$(System.DefaultWorkingDirectory)'
            displayName: BuildAndPush
      - job: DeployToCloudRun
        dependsOn:
          - AuthenticateBuildAndPush
        pool:
          name: DEFAULT
          demands:
            - Agent.Name -equals ubuntu-agent1
        steps:
          - script: |
              echo "$GCP_KEY" | base64 -d > $(Agent.TempDirectory)/gcp-key.json
            displayName: CopyKeyToAgent
            env:
              GCP_KEY: $(app-connection-key)
          - script: |
              gcloud auth activate-service-account --key-file=$(Agent.TempDirectory)/gcp-key.json
              gcloud run deploy url-shortener \
                --image $(region)-docker.pkg.dev/$(project_id)/$(docker_repo)/url-shortener:latest \
                --region $(region) \
                --service-account cloudrun@$(project_id).iam.gserviceaccount.com
Just like the Terraform, we’re gonna break this down line by line, so let’s dive in.
Triggers
trigger:
  branches:
    include:
      - main
  paths:
    include:
      - requirements.txt
      - /app/*
The triggers block allows you to specify the exact conditions that cause the pipeline to run. In this case, that’s when any code changes on the main branch that directly impacts the app itself. I used include because I want the app to rebuild if the requirements.txt or anything in /app changes, but you could configure the same behavior with an exclude block that calls out all the other files. This is probably a bit more concise though.
Variables
variables:
  - group: gcp_service_account_keys
  - group: gcp_project_variables
This just pulls in my variable groups that store my keys and project variables and makes them accessible anywhere in the pipeline. So now I can reference my project ID with $(project-id) or the key for infra_pipeline_sa with $(infrastructure-connection-key).
Stages, Jobs, Steps
This is the meat of the pipeline so I want to break this up into smaller pieces so we can look at them more closely.
ADO pipelines follow a hierarchy of tasks. At the top are stages, which can be split into jobs. Then jobs can be further split into steps.
For each part of the pipeline’s execution, there has to be a computer somewhere that does the actual work. This is accomplished with what’s called an agent that’s selected out of a pool. The agent is just a virtual machine, and a pool is just a set of virtual machines that are sitting ready to do work.
Side quest to self host an agent
I naively assumed that I would be able to use an agent provisioned by Microsoft, but was dismayed to find that I did not have access and needed to fill out some form requesting an exception that would take a few days to process. So instead of dealing with all of that, I decided to just spin up a virtual machine on my home server and self host the agent, which you can see here:
stages:
  - stage: Authenticate
    jobs:
      - job: AuthenticateBuildAndPush
        pool:
          name: DEFAULT
          demands:
            - Agent.Name -equals ubuntu-agent1
To set up the VM, I downloaded an Ubuntu Server ISO and installed it on a small VM. To set up the VM as an agent, I installed the Azure Pipelines agent:
mkdir agent && cd agent
curl -O https://download.agent.dev.azure.com/agent/4.266.2/vsts-agent-linux-x64-4.266.2.tar.gz
tar zxvf vsts-agent-linux-x64-4.266.2.tar.gz
./config.sh
sudo ./svc.sh install
sudo ./svc.sh start
Shortly after running that last command, I could see the agent had come online: 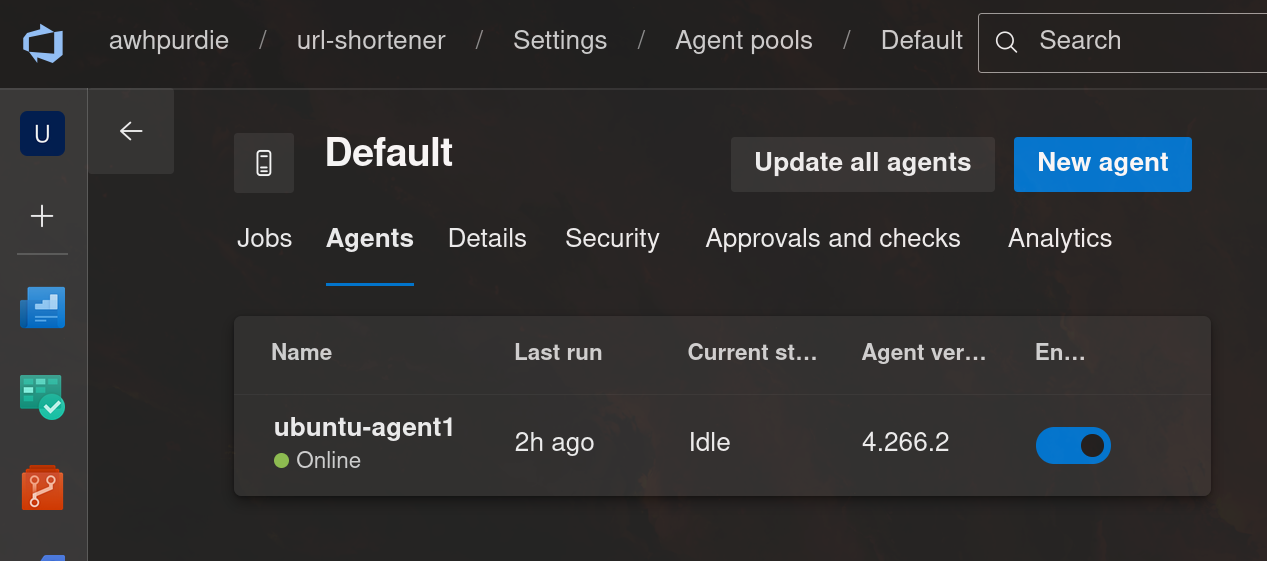 Finally, I installed the GCP SDK and Docker so that the agent would have the software it needed to build the container image and interact with GCP.
1st job: AuthenticateBuildAndPush
The first job of the app pipeline copies the app_pipeline_sa key onto the agent, authenticates to GCP, and builds and pushes the container image to the Artifact Registry. That’s all done in three steps, and each step is executed as a script:
        steps:
          - script: |
              echo "$GCP_KEY" | base64 -d > $(Agent.TempDirectory)/gcp-key.json
            displayName: CopyKeyToAgent
            env:
              GCP_KEY: $(app-connection-key)
The first step just executes a single command that copies the decoded app_pipeline_sa key from the ADO variable group into Agent.TempDirectory, which is a temporary directory created for this job only. Once the job is over, the temporary directory is deleted. I named the step CopyKeyToAgent and put the app_pipeline_sa key in an environment variable so the agent could access it (this is one way to pass variables from an ADO variable group to a pipeline).
          - script: |
                gcloud auth activate-service-account --key-file=$(Agent.TempDirectory)/gcp-key.json
                gcloud auth configure-docker $(region)-docker.pkg.dev
            displayName: AuthArtifactRegistry
            env:
              GOOGLE_APPLICATION_CREDENTIALS: $(Agent.TempDirectory)/gcp-key.json
The second step authenticates into the app_pipeline_sa using the copied key from the previous step, then authenticates into the Artifact Registry using the service account. The environment variable GOOGLE_APPLICATION_CREDENTIALS is useful because gcloud already knows to look for the path to application credentials in this environment variable, so this runs smoothly without human interaction.
          - script: |
              docker build -t $(region)-docker.pkg.dev/$(project_id)/$(docker_repo)/url-shortener:latest .
              docker push $(region)-docker.pkg.dev/$(project_id)/$(docker_repo)/url-shortener:latest
            workingDirectory: '$(System.DefaultWorkingDirectory)'
            displayName: BuildAndPush
The final step of the job is to build the container image, tag it, and push it to the Artifact Registry. The tag is important because it’s what helps make sure Cloud Run is always serving up the most recent version of the image.
2nd job: DeployToCloudRun
So we’ve built the container image and we’ve pushed it to the Artifact Registry, but we still need to tell Cloud Run to serve it up. That’s what the 2nd and final job of the app pipeline does. In the first step, we copy the app_pipeline_sa key again (because this is a new job, so the temporary directory has been wiped clean) and then deploy to Cloud Run:
          - script: |
              gcloud auth activate-service-account --key-file=$(Agent.TempDirectory)/gcp-key.json
              gcloud run deploy url-shortener \
                --image $(region)-docker.pkg.dev/$(project_id)/$(docker_repo)/url-shortener:latest \
                --region $(region) \
                --service-account cloudrun@$(project_id).iam.gserviceaccount.com
The script authenticates as the service account again and deploys the app in a specific region using the Cloud Run service account (which if you were wondering earlier is why the app_pipeline_sa needed permission to act as the Cloud Run service account).
Writing the infrastructure pipeline
Next, I want a pipeline that will handle managing the infrastructure. This pipeline should fire off the Terraform command whenever a change is made to the Terraform configuration files. Like before, I’ll show you the pipeline in its entirety, then we’ll walk through it line by line.
trigger:
  branches:
    include:
      - main
  paths:
    include:
      - terraform/*
variables:
  - group: gcp_service_account_keys

stages:
  - stage: Plan
    jobs:
      - job: TerraformPlan
        pool:
          name: DEFAULT
          demands:
            - Agent.Name -equals ubuntu-agent1
        steps:
          - script: |
              echo "$GCP_KEY" | base64 -d > $(Agent.TempDirectory)/gcp-key.json
            env:
              GCP_KEY: $(infrastructure-connection-key)
          - script: |
              terraform init \
                -input=false \
                -migrate-state \
                -backend-config="bucket=url-shortener-state" \
                -backend-config="prefix=test" \
                -backend-config="credentials=$(Agent.TempDirectory)/gcp-key.json"
              terraform plan -input=false -out=tfplan
            workingDirectory: '$(System.DefaultWorkingDirectory)/terraform'
            env:
              GOOGLE_APPLICATION_CREDENTIALS: $(Agent.TempDirectory)/gcp-key.json
  - stage: Apply
    jobs:
      - deployment: TerraformApply
        environment: 'Production'
        pool:
          name: DEFAULT
          demands:
            - Agent.Name -equals ubuntu-agent1
        strategy:
          runOnce:
            deploy:
              steps:
                - script: |
                    echo "$GCP_KEY" | base64 -d > $(Agent.TempDirectory)/gcp-key.json
                  env:
                    GCP_KEY: $(infrastructure-connection-key)
                - script: |
                    terraform apply -input=false -auto-approve tfplan
                  workingDirectory: '$(System.DefaultWorkingDirectory)/terraform'
                  displayName: 'Terraform Apply'
                  env:
                    GOOGLE_APPLICATION_CREDENTIALS: $(Agent.TempDirectory)/gcp-key.json
Since we’ve already discussed triggers and pools, I won’t go over that again. We’ll just cover the stages, jobs, and steps. I’ll also skip talking through the authentication steps in detail since we’ve already covered that. The only differences are that the trigger for this pipeline is a change to the Terraform files and the authentication uses the infrastructure_pipeline_sa key.
1st Job: TerraformPlan
This job has two steps: the first step is to copy the infrastructure_pipeline_sa key to the temporary directory, and the second is to run terraform init and terraform plan:
          - script: |
              terraform init \
                -input=false \
                -migrate-state \
                -backend-config="bucket=url-shortener-state" \
                -backend-config="prefix=state" \
                -backend-config="credentials=$GOOGLE_APPLICATION_CREDENTIALS"
              terraform plan -input=false -out=tfplan
            workingDirectory: '$(System.DefaultWorkingDirectory)/terraform'
            env:
              GOOGLE_APPLICATION_CREDENTIALS: $(Agent.TempDirectory)/gcp-key.json
There are some flags on the init and plan commands that might look unfamiliar.
On init,
- The
-input=falsetells Terraform to not ask for input from the user, which is important for a pipeline like this where a human isn’t there to provide details. If the command needs information that’s not already configured somehow, it will throw an error. -
-migrate-statetells Terraform to migrate the state to a newly configured backend. So, if I want to move the backend configuration to a different bucket, this will preserve the existing state of my infrastructure. -
-backend-config="bucket=url-shortener-state"tells Terraform the name of the GCS bucket to store the infrastructure state in. -
-backend-config="prefix=state"specifies the path prefix within the bucket. So in this case, the state is stored atstate/default.tfstate. -
-backend-config="credentials=$GOOGLE_APPLICATION_CREDENTIALS"explicitly tells Terraform where to find the service account key.
On plan,
-
-input=falsedoes the same thing here as ininit. -
-out=tfplangives the plan a name that can be referenced in theapplycommand, which helps guarantee that the plan presented in the terminal is what actually gets applied.
2nd job: TerraformApply
Let’s look at the beginning of this part of the pipeline more closely, especially the highlighted lines:
  - stage: Apply
    jobs:
      - deployment: TerraformApply
        environment: 'Production'
        pool:
          name: DEFAULT
          demands:
            - Agent.Name -equals ubuntu-agent1
        strategy:
          runOnce:
            deploy:
              steps:
# ... the rest of the pipeline steps
The stage that handles applying the infrastructure uses what’s called a deployment job. This allows me to attach the job to a specific environment (in this case, ‘Production’). Then, the strategy: runOnce and deploy: steps options is the simplest deployment strategy I can specify (just run the steps a single time). This allows me to add an approval gate to the pipeline:
The reason I set this up this way is because it allows me to review the output of the plan command before allowing apply to run, which gives me a chance to make sure everything is configured correctly and is going to do what I expect it will do.
Demo
We’ve been through so much, and now everything is finally in place to run this URL shortener completely from GCP. My pipelines have both run successfully: 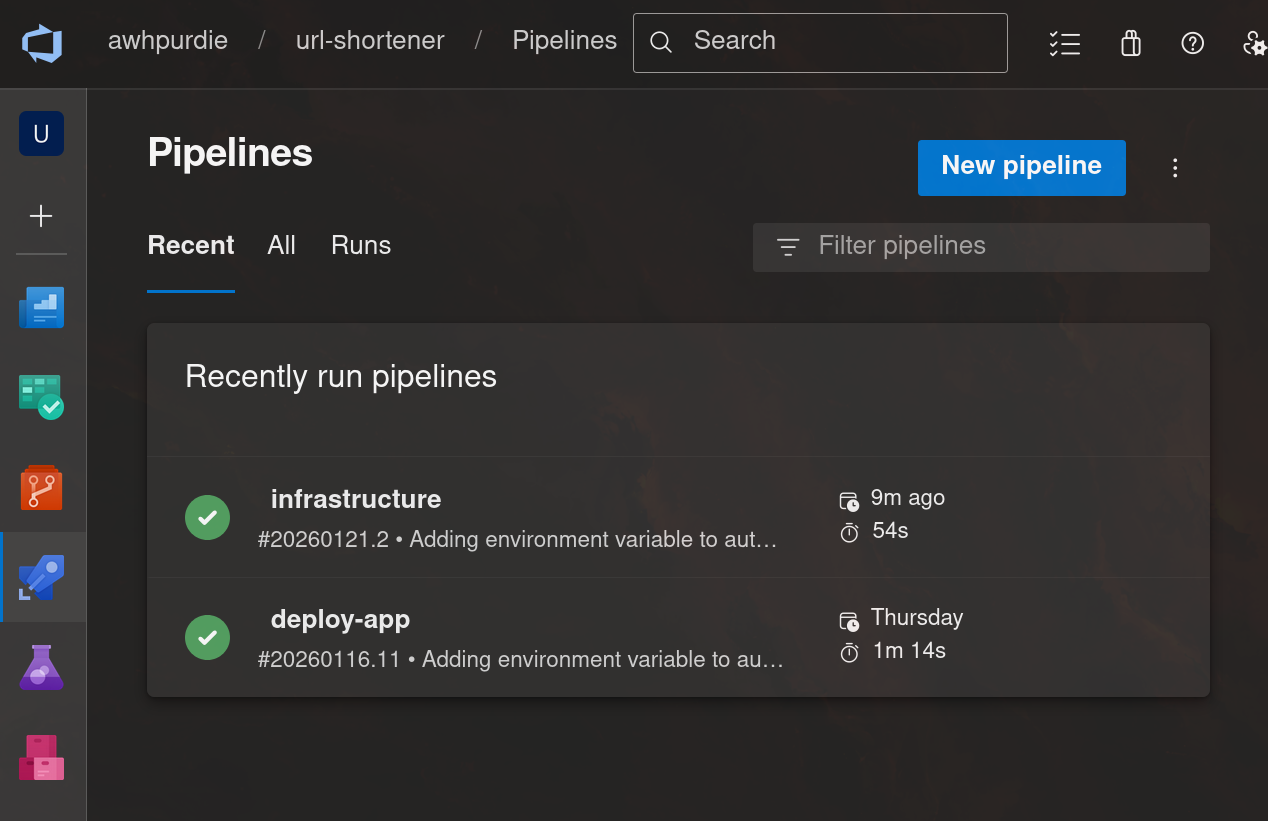
So now, the URL shortener should be working…
Neat! It works!
Conclusion
Wow, what a journey we’ve been on. We’ve dabbled with APIs written in Python with FastAPI, then we talked about containerizing that API, then we wrote a bunch of IaC with Terraform to run the API container image on GCP, and then we finally automated all the CI/CD with ADO pipelines.
I really enjoyed working on this, it was a great opportunity to learn a bit about a lot of different technologies that are in demand right now and enable you to do some really cool stuff. I’m already looking forward to the next one!
Enjoy Reading This Article?
Here are some more articles you might like to read next: